Let’s just jump right in to the subject of channels. I will attempt to explain everything as it happens. You don’t have to do everything shown below. Hopefully, I have provided enough screen shots that reading about it will explain the basic concepts of channels.
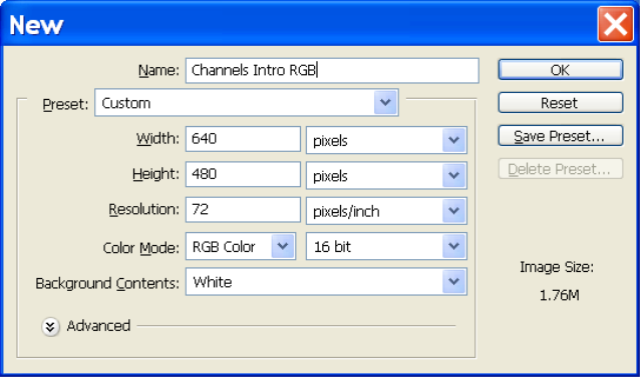
1) Create a new Image in Photoshop with the following settings:
The most important setting here is the Color Mode setting (CMYK).
CYMK stands for:
C = Cyan
M = Magenta
Y = Yellow
K = BlacK
When the CMYK color mode is selected it can be assumed that you are creating an image that is to be used for printing at a printing press. If you take a look at your news paper you should notice that all the images are made up of tiny colored dots. These dots are originally cyan, magenta, yellow, and black. When these are combined they can create almost any hue.
2) After clicking on OK you should find your self on a blank new canvas. Open up the colors Palette ( Window > Color or just press F6 key on most windows machines). You should see the following:
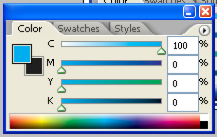
If you dont’ see C M Y K sliders then click on the arrow in the circle on the upper right corner of the Color window and choose CMYK Sliders from the menu. Also make sure that CMYK Spectrum is selected as shown in the following image:
3) In the color window choose the following settings:
C (Cyan Slider) = 100%
M ( Magenta ) = 0%
Y ( Yellow ) = 0%
K ( Black ) = 0%
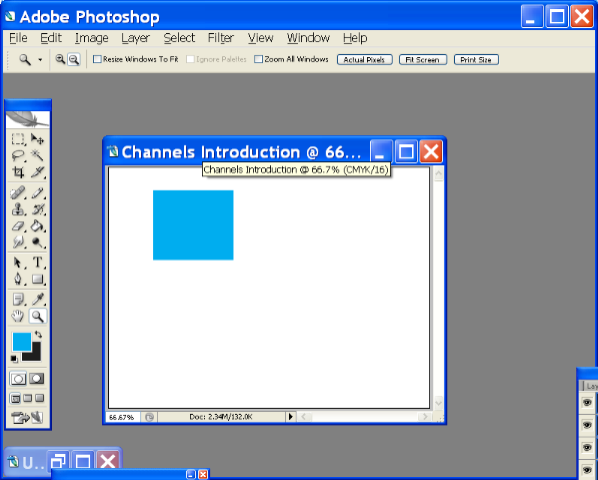
Make a square selection and fill it with the color that we just made (solid CMYK Cyan). It should look something like this:
Now repeat the process but this time with magenta. Use the following settings:
C (Cyan Slider) = 0%
M ( Magenta ) = 100%
Y ( Yellow ) = 0%
K ( Black ) = 0%
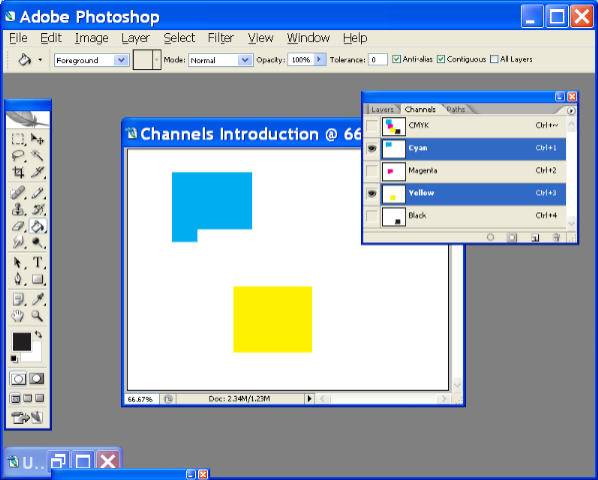
Keep repeating this. Make one color 100% and all the rest should be zero. Make a square with each. In the end you’ll have the following:

4) Finally, open up the Channels Window / Palette. You should see 5 channels. CMYK, Cyan, Magenta, Yellow, Black. Currently, they are all selected, therefore, you see all the colors. Click on the Cyan Channel and the areas with cyan color will turn black. The rest will disappear. Click on Magenta, Yellow and Black and you will notice the same.
If you don’t want it to turn black then go to Edit > Preferences > Display and Cursors and choose Color Channels in Color. Now when you click on a Channel only that color will be visible.

If you press the SHIFT key and then click on two channels then only those selected colors will be visible:
Think of this as ink on a white newspaper. If you put the ink on the paper then the paper will be colored. If there is no ink on the paper then it will appear white.
It is completely opposite for RGB channels. RGB stands for:
R = Red
G = Green
B = Blue
Your highschool art or physics teacher probably taught you that when you add all the primary colors of light then you get white light. And If you shine white light through a prism you get a rainbow effect.
 Also if you color the fins of a paper windmill red, green and blue and spin it very fast then the colors disappear and you get white light.
Basically, you can think of RGB channels as being HUGE red, green and blue flood-lights. When you turn on all flood lights you’ll get white light because all the three primary colors combine.
If you only turn on Red light you will only see stuff as red because green and blue will be missing and so on.
Lets try the above steps in RGB mode. Since we went through all that CMYK stuff above I won’t go into as much detail with RGB.
1) Make a new image. Make sure that the color mode is RGB.
2) Open the Colors Window / Palette. Click on the options arrow on the upper right corner and make sure you select RGB Sliders and RGB Spectrum.
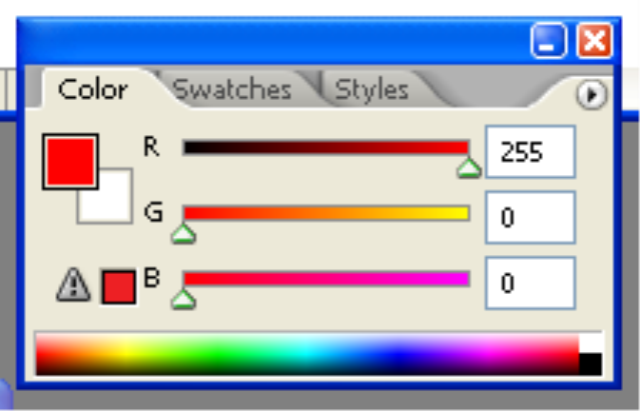
3) Make the red value 255, make sure green and blue are 0. Then create a square and fill it with that color. Repeat the process with Green (make green 255 and the rest 0). Then create a square and fill it with that color. Finally, repeat the process with Blue (make Blue 255 and the rest 0). Then create a square and fill it with that color.
You should end up with something like:
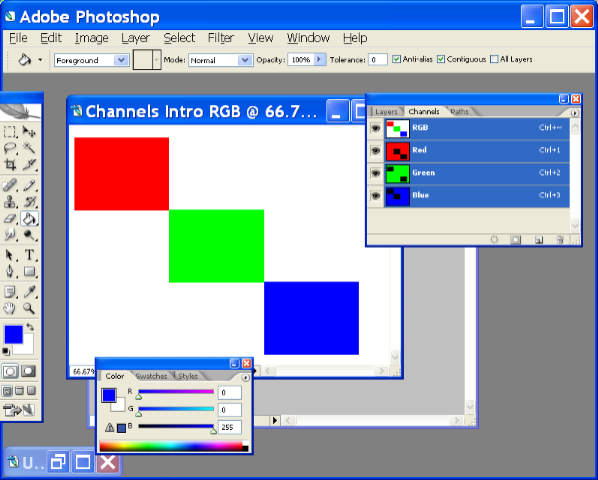
4) Choose the Red channel and you’ll notice that it acts completely different than CMYK. Everything turns red instead of the areas with Green and Blue. Green and Blue turn Black.
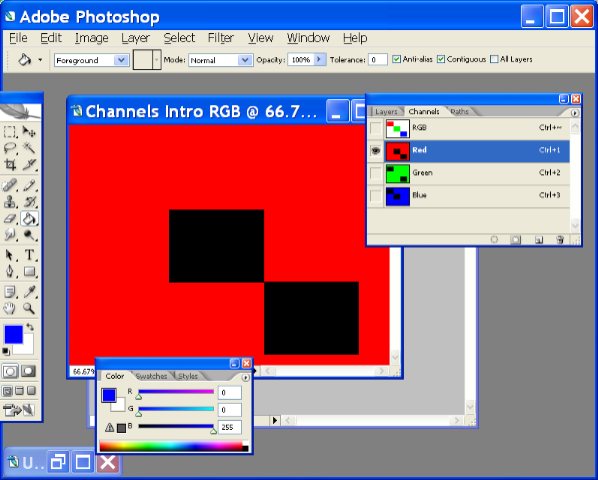
Don’t forget that we are dealing with LIGHT and not INK. When there is absense of light then that area becomes dark/black. Obvious, isn’t it? When you turn off the lights the room goes dark.
But why is everything else red? The white areas are red?
If you remember from a few paragraphs back when you add red, green and blue together then that forms WHITE. When you only turn on the RED light and turn off blue and green then what will you have left? Red. Turn on green and blue lights back on and you’ll get white again (because they have combined together again).
Now you are the master of understanding basic RGB and CMYK channels.
CMYK = Coloring with INK
RGB = Coloring with LIGHT
Next in the Channel Series:
- Channels! What are they good for?
- Alpha Channels
- Spot Colors
- Line Art using Channels
- And more…
Thank you :)!
This was very helpfull to me!.
Ravii.
Thanks for providing such concise descriptions and methods – I will always point my students towards this website.
i’m just starting to get the point of colors and channels thanks to you!!!!!!!!!
i will read and try to understand every tutorial you provide
Great instructional value and well done
Thanks everyone. Your comments mean a lot to me.
I’ll be starting writing again regularly soon hopefully. *ashamed for long time off*