 The Magic wand tool is fairly simple to understand. You just point it at an area and click and it will select all the areas with continuous similar color values around where you clicked.
It is fairly simple to use but I seem to be having problems explaining what exactly it does so I’m going to demonstrate it using screen shots.
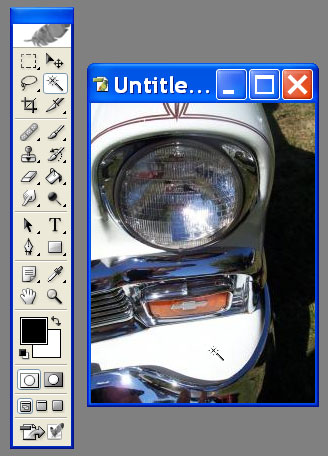 Here is a picture of the front bumper of the car. I can see that it has a continuous area of white. I want to select it quickly and I don’t want to mess around with Lasso tools. A situation like this is perfect for the magic wand tool. In this screen shot I have selected the Magic Wand Tool and I am about to click on the front bumper of the car.
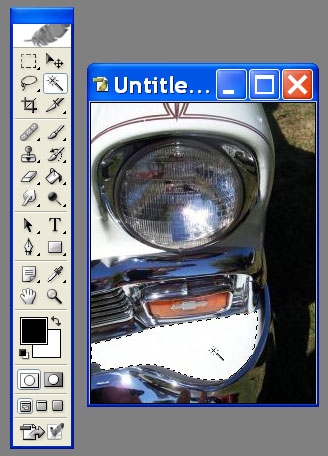 Now I have clicked on the white area and photoshop has automatically selected the entire white area. However, you can notice that a small sliver of the bumper has not been selected because of a slight color difference. We should be able to select that using the Tolerance value in the Magic wand Option Toolbar 😀
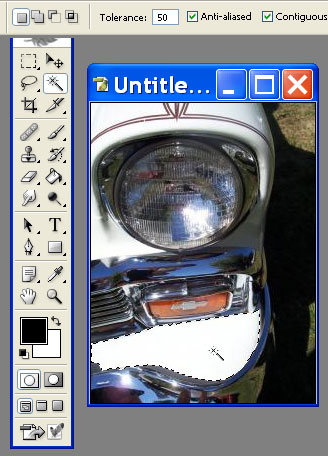
Here is the effect of increasing the Tolerance to 50. What is the tolerance? This is basically the range of colors or shades of the color that the magic wand tolerated. If Tolerance is set to 0 then the tool will ONLY select the EXACT colors that match the pixel that you clicked on. We set the tolerance to 50 so that meant that it selected 25 shades above and 25 shades below the color that we clicked on.
Anti-Aliased means that you will get a smoother curved edge. Continguos means that it will select only areas that are connected to the color that you clicked on. Uncheck that and it will select the color that you clicked on on the whole Layer.
If you want it to select colors on the whole image then check the option that says “Use All Layers”
The other 4 options are the same as other selection tools
The right most button is the “New Selection” button. When this is pressed then our tool will select what ever you click.
The second button is the “Add to Selection” tool. This does what the name suggests. If you have selected an area of your picture and you want to extend that selection or select another part of the picture while keeping the first selection still active then you choose this button before making another selection. Instead of creating a new selection it will ADD to what ever is already selected.
The third one is just as useful and important as the second button. This is the “Subtract from Selection” tool. You guessed it, if you want to REMOVE a part of the selection then choose this button and then click. What ever your selection now touches will be removed from what was initially selected.
The fourth button is “Intersect from Selection”. If you have a new selection and you chose the Intersect from selection tool then make a selection that over laps your first selection then only the areas that are overlapping will remain selected.
good, subscribe me to PS tips & tutorial
Thanks 🙂
Pingback: eMarketing Tavern » Blog Archive » Photoshop Elements Tutorials
hello. when will you continue your tutorials?
i really learned a lot from this site. thank you.