![]() When I first started with photoshop I really did not ever find the need to use selection masks. Now I feel that they save a lot of time and are very useful.
When I first started with photoshop I really did not ever find the need to use selection masks. Now I feel that they save a lot of time and are very useful.
Selection masks are different than Layer Masks. Layer Masking basically allows you to fine tune the visible and invisible parts of your layer.
Selection Masks, on the other hand, allow you to have more control over your selections. And selecting stuff is a major part of Photoshop.
Before continuing please make sure that you understand Photoshops Marquee Tools and Lasso Tools. If not then check out our Photoshop Tips Tutorial Page.
Quick Masks
A quick mask allows you to select a portion of your image using your Paint Brush or Pencil Tool. Sometimes it is more convenient and more precise to do that instead of trying to aim exactly using the lasso tool for selecting portions of your images.
The best way to understand the quick mask feature is to actually use it in some examples.
So lets start:
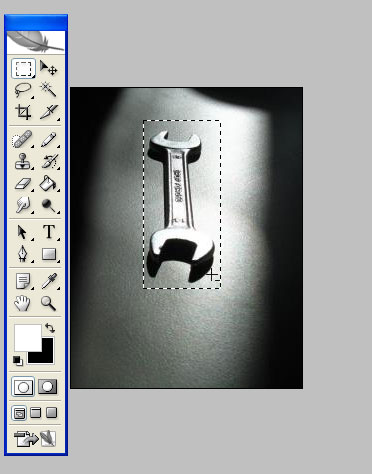
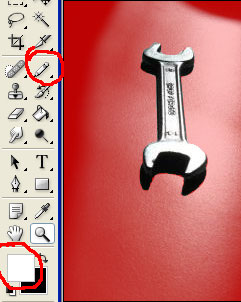
- 1. Here is a picture of a small wrench. This Tutorial will focus on selecting the wrench using Quick masks. First I’ve made a marquee selection around it to select everything that we can easily select
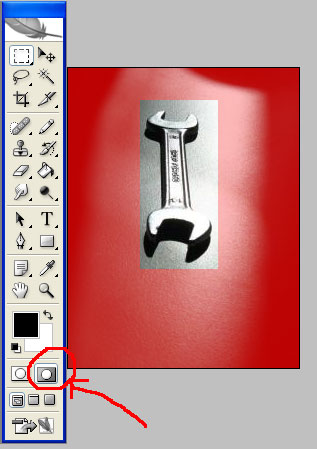
- Next click on the QuickMask button on the Photoshop Toolbar. It is shown on the image below circled in red towards the bottom. You’ll see that a red shade has shown up on everything that was NOT selected. Everything that looks normal is what IS selected
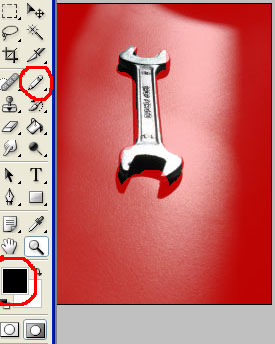
- Next you can grab the Pencil tool (or Brush) and change the FOREground picture to BLACK. Next, roughly paint around the wrench. We chose BLACK because black UNSELECTS and grows the mask. On the other hand, WHITE SELECTS and makes the mask smaller. I have the following so far:
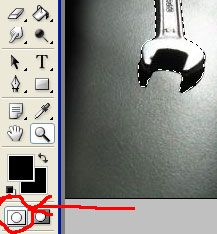
- Next I zoomed in to the image around the edges of the wrench. Then, I chose the PENCIL tool and changed the FOREground color to WHITE. Then carefully selected all the rough edges of the mask. Once I did that I only had the wrench selected.
- Then press the Standard Mode button. It’s right next to the quick mask button on the toolbar. And your wrench is perfectly selected 😀
You can change the way the quick mask works a little by double clicking on the Quick mask button. If you double click on the quick mask button you will get the following window:
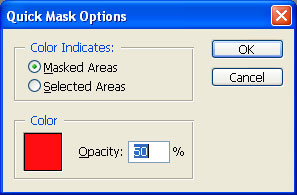
There is no real reason to change these options. It maybe a persons personal preference to want to change these. It only controls the color and opacity of the quick mask. You can also change it so that it turns the selection red instead of the unselected area. I don’t recommend changing these unless there is a good reason to.
Now that we have a selection the next thing to learn about is ALPHA CHANNELS.. oooo.. it’s really simple. don’t worry 😀
Alpha Channels
Sometimes you take a long time to get a perfect selection. Then you might want to deselect and work on the whole image and later come back to the selection. Then you have to carefully reselect the object again taking a long time.
It would be nice if we could save the shape of the selection so we could reuse it and not worry about deselecting and reselecting, wouldn’t it?
That is where alpha channels come in. They allow you to Save Selections.
The steps are very simple:
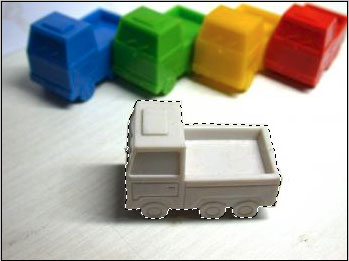
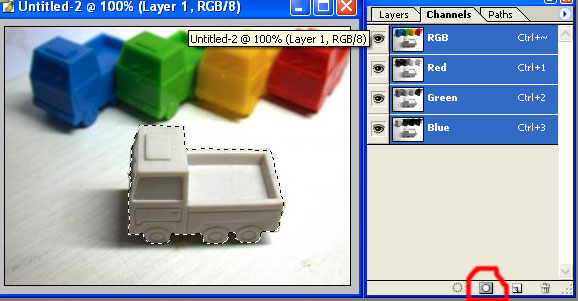
- Here I have created a selection that I want to easily recreate. If I want to add an effect to the entire image I would have to deselect. If I do that I would lose the selection. So we want to save the selection
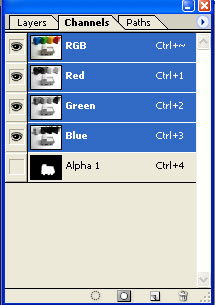
- With the picture still selected go to the Channels Palette (usually next to the layers palette or go to Windows>Channels) and on the bottom you will see the SAVE SELECTION button (circled in the screen shot below). Click it and you will see an Alpha Channel appear in the shape of your selection
- Now you are free to deselect your image and work on the whole thing. When you want to reselect the portion that you saved just go to the Channels Palette and CTRL+CLICK on the Alpha Channel and your image will be RESELECTED 😀
You can also change your alpha selection in the same way you changed the Quick mask. That is, choose the paint brush or Pen Tool and draw in BLACK to remove from the selection or draw in white to add to the selection.
Using the stuff you learnt here you can speed up your selection process. 😀
I hope this was useful! Comments and Questions are welcome.
That’s cool but you haven’t mentioned that the Masked Areas has to be selected on the first part when making the first selection
Thank you soooooo much! This will allow me to be able to use the text wrap function in InDesign much more efficiently! Your the best!
Pingback: Home Insurance
thanks thanks thanks !
Pingback: Dentist Insurance