 To put it as simply as possible all the move tool does is move stuff. There is ofcourse a lot more to it than that. Just like all the other tools the move tool is very powerful when you know about everything that it can do. By the end of this post I’ll have covered almost everything there is to know about this Tool. 🙂
If you are using any tool (with the exception of hand tool, magnifying tool. It works differently with the pen tools) and you hold down the CTRL key the tool will automatically change into the Move tool. This should give you an idea of how important and often used this tool is intended to be.
By default if you choose the Move tool and just drag on an unlocked Layer you will be able to move it. Click and drag to the right and the whole layer will drag to the right and so on. If you chose the move tool and then use the arrow keys and press left, right, up or down your layer will move pixel by pixel in the direction of your choice.
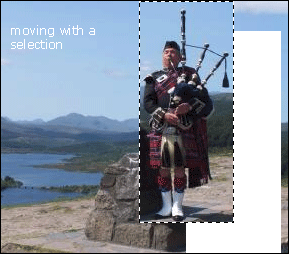
If you make a selection using the Selection Tools (Lasso, Marquee) and then use the Move tool in side the selection you will see that it turns into an arrow with a scissors. That shows that it will cut the selection out from your layer and move it where ever you want it to move.
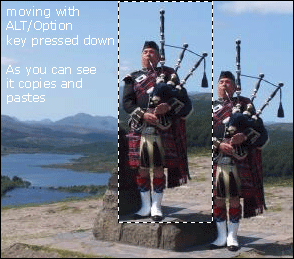
If you hold down the ALT/OPTION key and then click and drag your selection it will COPY and paste your selection meaning that it will let the original remain untouched. It will only copy it and then paste it where ever you release your mouse button.
Alignment Options
Another strength of the Move tool is alignment of layers. These options are accessible through the Move Tool Option Bar that shows up on the top of the screen when you select the Move Tool.
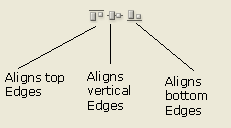
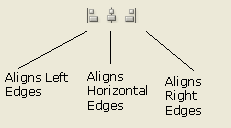
- Align Top Edges button will make the top pixels of your layers align evenly. If you make a selection box then your layers top will be at the same coordinate as the top of your selection. If you link 2 layers then choose the Align top edges option then both your layers will have their top edges at the same height.
- Align Vertical Edges button will align the middle pixel of your layer with the vertical center of your selection or linked layer. This means that your layers center will be at the center of your selection or linked layer.
- Align Bottom Edges button will make the bottom pixels of your layers align evenly. If you make a selection box then your layers bottom edge will be at the same coordinate as the bottom of your selection. If you link 2 layers then choose the Align Bottom Edges option then both your layers will have their bottom edges at the same height.
- Align Left Edges button aligns the left pixels with the left most edge of your selection or linked layers. Your Left edges will be at the same X-coordinate
- Align Horizontal Edges button aligns the horizontal center pixel of your layer with the selection box or linked layers. The horizontal middle of your layer will be at the horizontal middle of your selection or linked layers.
- Align Right Edges button aligns the right edge of your layer with the right edge of your selection or linked layer. Basically your layer will be positioned so it meets with the right edge of your selection or linked layer
Before you start aligning determine what you want to do. The options we have are:
- Align to the content of a layer to a selection border
- Align the contents of multiple layers to a selection border
- Align the contents of layers to the content of the active layer
Make a selection box with a marquee tool and then choose the Move tool and then press the appropriate button.
Make a selection box. Then select multiple layers in the Layers palette (Window>Layers) by clicking on the empty squares to the left of the layer that you want. You will see a little chain icon in the square if you click on it. Next choose the Move tool and then press the appropriate button.
Select multiple layers in the Layers palette by clicking on the empty squares to the left of the layer that you want. You will see a little chain icon in the square if you click on it. Next choose the Move tool and then press the appropriate button. They will align according to which layer is highlighted.
Distribution Options
The Distribute Tools basically evenly distributes your layers. If you want equal spaces between 3 or more layers then you will use these Move Options.
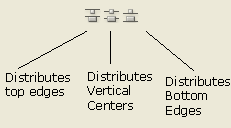
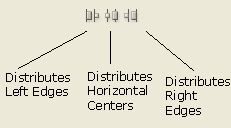
- Distribute Top Edges button will create a space between the layers using the top of the layers as a reference
- Distribute Vertical Centers button will create a space between the layers using the center pixel of all the layers as a reference.
- Distribute Bottom Edges button will create a space between the layers using the bottom pixel of each layer as a reference.
- Distribute Left Edges button will create a space between the layers using the left pixel of each layer as a reference.
- Distribute Horizontal Centers button will create a space between the layers using the horizontal center of all the layers as a reference.
- Distribute Right Edges button will create a space between the layers using the right edges of all the layers as a reference
This can only work if you have 3 or more linked layers.
Select multiple layers in the Layers palette by clicking on the empty squares to the left of the layer that you want. You will see a little chain icon in the square if you click on it. Next choose the Move tool and then press the appropriate Distribute button. They will Distribute accordingly.
Thank you for this help! It was like the simplest thing but i just couldnt find the move button it was very helpfull:)!
Pingback: Cool Myspace Layouts