 This is one tool that everyone wishes they had in their make up kit. Acne, Scars, Bruises, Torture marks, Burn marks, stab wounds, etc can all be easily fixed using this tool.
The way this works is that you choose an area where everything is the way you want it to be. Photoshop notes down the textures, colors and lighting of the source area. Next you click on the area that needs to be repaired. Photoshop carefully adjusts all the pixels so that the textures and lighting still match and all the surrounding pixels look normal as well.
The best way to learn about this is by getting some examples.
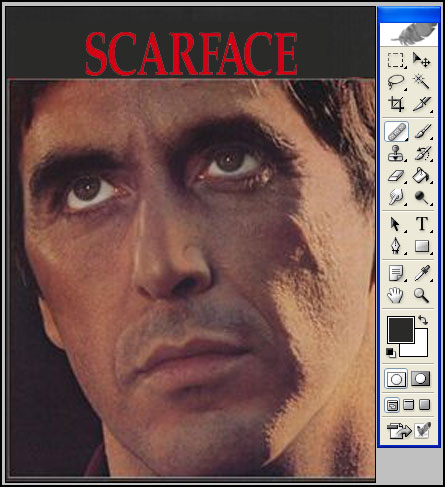
Here is Scarface. We’ll try and remove his scar.
First choose the Healing Brush Tool. It tools like a bandaid. Make sure that in the healing brush option bar you have selected Blending Mode: Normal and Source: Sample. Then hold down the ALT key(or Option key if you are on a Mac) (your mouse pointer will look like a little target “((+))” ) and click on a place where there is no scar. This just got a sample of what his good skin looks like. Photoshop noted down the texture, color and brightness of the good area.
Next let go of the alt key and then click and drag on the scar. From the top and to the bottom of a medium sized section. See.. things are already a lot better.
Now press ALT again and click on areas close to where the scar was but not right on it. We’re just getting more texture to put on the healed part to make it look real. Press ALT click. Let go of Alt and then apply it in short controlled strokes. Here you will have to practice and try a couple of times to see what makes it look the best. Do this till it looks good. If it messes up then go back and try again. Be sure to work on a copy of your image incase you accidently save over the original.
Here is what I ended up with.
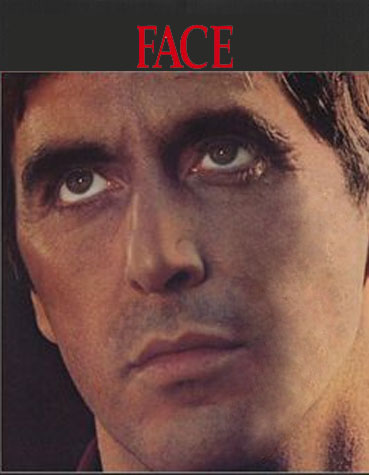
Ofcourse a much better job could have been done by carefully zooming in and healing each section of his scar seperately. I kind of accidently made him look like he has swelling on his left cheek. Trust me.. you can get much better results if you take your time and do it carefully. You all should try it out your selves. Only with practice will you master this tool!
In the healing brush tool option bar you will see Sample option and the Texture option. We used the Sample option in the above mini-tutorial. That got the texture sample from where you ALT-Clicked.
If you choose the Texture option you can pre-select which texture to apply. You can create your own textures or use some of photoshops predefined textures. It will still get the color and brightness levels from your image but it will apply the texture you choose here. Since its getting a preselected texture you won’t have to Alt-Click.
Thats it for now. Please post any questions or comments. If you spot a mistake please let me know 🙂 .
Pingback: photoshop tips » Patch Tool
Have you sny tips re hiding a large blemish(on the subjects forehead) in a black & white photograph?
Pingback: Customized Design Solutions
Pingback: Acne Remove Scar