The holiday season is fast approaching and people will soon be using Photoshop to create Christmas greeting cards, banners, and flyers. Most of them will probably want to create some pictures of Christmas decorations on those cards. This is a quick and dirty tutorial to get started with creating ornaments
The Magical Color Changing Christmas Ornament
I don’t enjoy doing something over and over. Repetitive tasks get boring so most of the time we should be reusing our work. The following tutorial shows how to make a Christmas Ornament graphic that you can quickly modify in a few seconds.
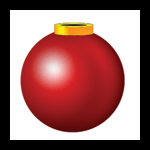
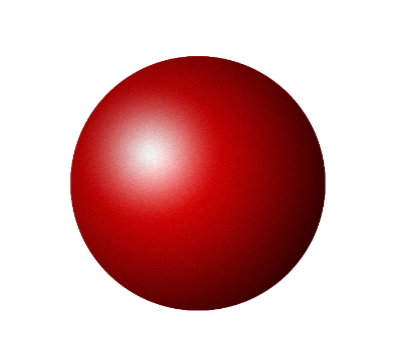
This is what the end product will look like:
Best of all, if you want to change the color you will just edit one layer and you’ll end up with a brand new Christmas ornament with out losing any of the cool effects.

There.. that literally took 4 seconds.
Let’s Begin 😀
1) Creating the base layer
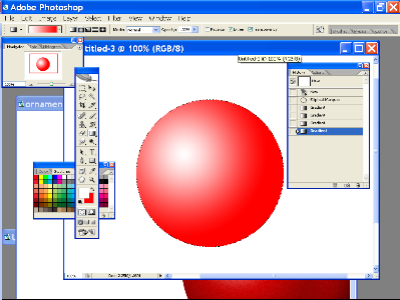
Create a new image ( File > New ). Choose what ever settings you like. I chose the 1024×768 preset.
Create a New Layer. Rename this layer and call it “BASE”.
Choose the Layer called BASE by clicking on it in the Layers Palette.
Grab the Elliptical Marquee Selection Tool
If you hold down the SHIFT key and then drag then you will get a perfect circle. Do that now. Shift+click and then drag on your image. Make a nice round selection.
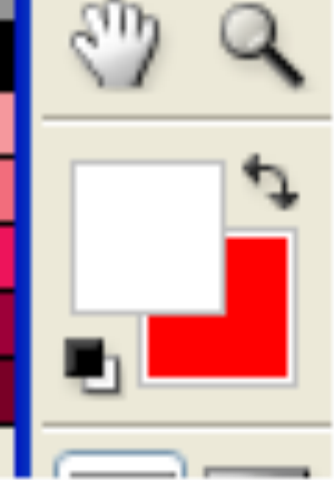 In your color picker, Choose WHITE as your foreground color. And choose RED as your background color.
Now grab the Gradient Tool ( G ) . When you choose the gradient tool you should notice that the top tool bar changes. You will see a Gradient Picker.

Click on that gradient picker area (in the screen shot above it’s the area with the red to black gradient. After you click on it you should see the Gradient Picker window. Choose Foreground to background. Then inside the circle selection make a diagonal line going from upper left to lower right. Keep trying until your circle looks like the following:
Next, go to Filter > Noise > Add Noise. I chose 6% noise, Uniform and Monochromatic.
2) Making it 3D-ish.
Create a new layer. Call it “3D effect”.
Choose the layer called “3D Effect”
CTRL+Click on the layer called “Base”. This will select the circle. Make sure that 3D effect layer is selected. Then go to Edit > Fill > Choose Color in the Use menu > and choose 100% Black as the color.
Now click on the Add Layer Mask button on the bottom of the Layers Palette.
Click on the black colored layer mask next to the 3d effect layer. Choose the gradient tool. Use a Foreground to Transparent gradient. Make another diagonal line inside the selected circle. Keep trying until you get something like this:
You may have to click on delete and try again until you get it looking like the image above.
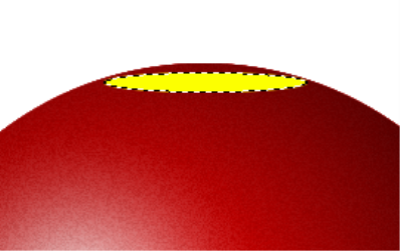
3) Making the Ring
Create a new layer. Call it “Ring”.
Make a small narrow oval selection on top of the orb and fill it with a color. I chose yellow. It should look like this:
Choose the move tool.
Now press ALT and the up arrow. This will duplicate the selection and nudge it upwards.
Press up until the little ring is high enough.
And the end choose Select > Modify > Contract. Enter in a number like 3 pixels and then fill it with black.
You can also apply a reflected gradient on this ring.
You should end up with something that looks like the following:

4) Making the final Glow
Make a new layer. Call it “Glow”.
Control click on Base. This will select the circle.
Go to Select > Save selection. Name should be Circle 1.
Grab the marquee tool and click and drag the selection slightly to the left.
Now click on Select > Save Selection.
This time in the Channel drop down menu choose Circle 1.
Operation should be Subtract from selection.
Go to the channels palette and click on Circle 1.
You should see something like the following:
Go to Filter > Blur > Gaussian Blur. I blurred mine 34 pixels. This may be different for you depending on what size you are working with.
Control Click on Circle 1 channel and then go back to the Glow Layer.
Click on Edit > Fill and fill it with WHITE. Finally change the blending mode for this layer to Overlay. Move this layer until it looks good.
5) Changing Colors.
If you want to change the colors of this ornament just click on the BASE layer. Then go to Image > Adjustment > Hue Saturation. Move the Hue slider and the color of the orb will change. All the glow effects will remain.
If you want to download my PSD to check out all the layers then just click the following link:
Ornament.zip ( Unzip it first )
[tags] Photoshop, Christmas, ornament, tutorial, tips, howto, channels, layers, masks [/tags]
in the 3d effect is there a steip missing. You say, “choose the 3d effect layer, then control click on the base layer. We I do this proceedure a drop menu appears. The 3D effect laying is no longer the chosen layer,but the base layer is selected. What step am I missing? Thanks
In step 3 you said: “Now press ALT and the up arrow. This will duplicate the selection and nudge it upwards”. Well it doesn’t nodge. I have to oval-shaped figures but without contact. If it is something I’m missing please reply. Thx
Mick Kendrew: Hi! Do you have the layer called “Ring” selected when you do alt+arrow keys? That’s the main thing that would cause it to not work. Or you might have to press the up key many times (atleast 10). Please let me know if that doesn’t work. Thanks!
Hey thank you very much for this cool tutorial :)!
I’m not trying to be mean but where as the globe is perfect… the top sucks… all the reality
of the globe is lost when you put that tinker toy on top. I don’t know what you’d do, but I’d put a little texture of some type along with a little beveling to get a little “real” into the top… Just a thought.
I am having a problem with the 3D step #3 – Even though I have selected the foreground to transparent in the gradient tool, the circle stays black even when I draw the diagonal line. I see some changes in the mask box on my 3D effect layer but not on the image itself (in other words, I can’t get the red to show through). Please help!
Thanks
A-
hai, ur tips r so good, these all r help me a lot
myspace.com/adamkwadsworth
this is the absolute WORST tutorial ever – BEFORE submitting and wasting time for the student, check your procedures to make certain they are correct-AWFUL
Shameful
this is the absolute WORST tutorial ever – BEFORE submitting and wasting time for the student, check your procedures to make certain they are correct-AWFUL
Shameful – well, i will say it again
tc grow up and show me something you got
I am using PSE 6.0
In Step 2 how do I add a layer mask?
Worst intructions ever!!!!!!!!!!!!
Worst tutorial ever
this tutorial is a fraud!!!!!!!!!!!!!!!!!!!!!!!!!!!!!
Please stop being mean to the creator of the tutorial. If you don’t have anything nice to say, don’t say anything at all. I’d like to see you meanies try and figure this out BY YOURSELF. Uh huh, oh yeah, can’t do it? Didn’t think so. If you can spend all your time on the computer BEING MEAN TO OTHERS, then get a life.
You just got told off by a kid.
This was actual terrific. Yes it is true that I was unable to get my masks to look like the tutorials masks, but I figured out work around’s so I got to the same point.
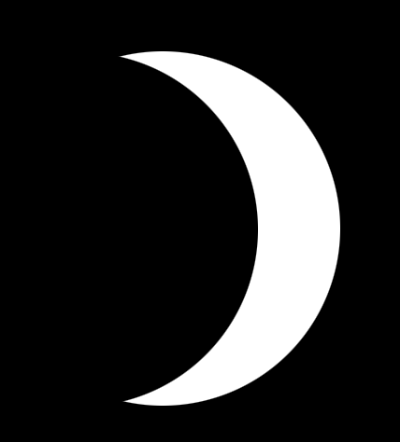
In step 3 that damned black mask would not give way to the chiaroscuro effect that was asked for, so I just ended up doing it right as a duplicate layer and then making the layer see through. again when the extra glow was needed, my mask showed a full moon not a sliver of the moon, and again, I needed to apply that layer as mostly see through.
Once I was done with the tutorial, it was up to me to plus it.
I made that black hole on top its own layer, then I put a gradient on the layer running from very very dark brown, to dark brown.
I made a new layer called wire, then, using the pen tool I made a bell curve and fit it into the top of the ornament where the black hole was. I stroked the curve path with a dull yellow then using the emboss layer style, I gave that some 3d. I used the Hue/saturation, in image and the exposure to make sure that my wire was the same color as the ring.
I made a new layer called “hook”, and made a hook using the same steps as above, but the color was a dark green.
I found a nice hearth picture, warped it onto the ornament, Using the cntr click on base (nice trick) to isolate the base layer, then selecting inverse and ctrl X ing I was able to get a reflection on the ornament. I then made the reflection layer about 80% see through, and now I was looking at a close to photographically real ornament.
Next I pulled in a Christmas tree branch for the background and repeated my trick above to include some of the branches in the reflection.
Finally, this takes an artist’s touch. I set my brush at 6% and made it wider than the RING layer. I painted the ring layer with a burnt umber and slight dulled it down, then with a narrower brush, I selected white and added highlights that would indicate multiple sources of light. At 6% the effects were so slight, I was able to make the ring look really authentic.
I went into the ornament itself, again isolating it with the Ctrl click on the base layer, and I manually darkened the lower part where the reflection of bottom sitting branches would be strongest, and I went around the outside of the ornament to increase the chiaroscuro.
At this time the ornament has a terrific pneumatic effect, and at the same time it looks made of glass. But it still hung without relation to the background.
Setting my brush wide, I picked a very dark green, and at 6% I started to subtract light from the branches in the background so that the ornament became part of the totality of the picture.
The ornament layer line was crisper than the lines in the background, so I grouped up all my layers having to do with the ornament and I merged them. Then I added a TINY surface blur to the group, giving it the same focus as the rest of the background.