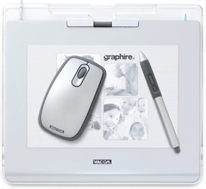
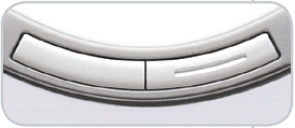
 Wacom, the leading graphics tablet manufacturer, just released the next version of their Graphire series. The Graphire 4 brings new features such as ExpressKeys, mouse with a scroll wheel, and a picture frame. They also added a second place to place your pen.
For people who are not familiar with what a Graphics Tablet is then you can click here. Here is a quote from the article:
A graphics tablet (or digitizing tablet) is a computer peripheral device that allows for a relatively simple method of inputting hand-drawn graphics or art into a computer in real time. They typically consist of a large flat surface for drawing on, and an attached “stylus” for drawing on the surface, originally as a part of the electronics, but later simply to provide an accurate but smooth “point”.
Basically you can grab a pen and draw instead of using a bulky mouse. That allows you to draw more accurately and more quickly. Plus, more people are used to drawing with pens and pencils so it helps with that too.
 From what I can see from the description on the site this really does not offer many new features. Basically its a Graphire 2 or Graphire 3 with 2 ExpressKeys (buttons that can be linked with a keystroke) and a handy place to place your pen. If you own a Graphire 2 or a Graphire 3 then don’t bother upgrading. If you are interested in getting an upgrade then save up and get an Intous 3. Now that is a good tablet!
For people who do not have a tablet right now then this is a good product to buy. It costs $99 and trust me… it is well worth that price. If you can’t afford that then just go on ebay.com and search for a used Graphire 2 or a Graphire 3. Make sure the seller tells you that its in good condition and then buy one of those. It will be drastically cheaper and just as good as any other Graphire. I recommend going with Wacom tablets to everyone. I had a bad experience with some other companies like Aiptek (don’t sue me aiptek aaaa)
Wacom: http://www.wacom.com
Graphire 4: http://www.wacom.com/graphire/index.cfm
Thanks for visiting 😀

 Welcome back to PhotoshopTips.net. Have you ever wanted to easily adjust only part of an image with out any hassles? Maybe you wanted to have more control over the options in the Image > Adjustments menu. If that’s the case then you need to learn about Adjustment Layers. Luckily, that is what this tutorial is about.
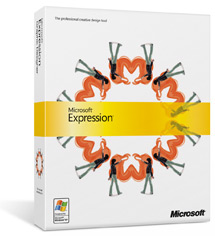
 The (semi) big news today in the “Photoshop world” is that microsoft just officially unveiled a
  Wacom, the leading graphics tablet manufacturer, just released the next version of their Graphire series. The Graphire 4 brings new features such as ExpressKeys, mouse with a scroll wheel, and a picture frame. They also added a second place to place your pen.
  From what I can see from the description on the site this really does not offer many new features. Basically its a Graphire 2 or Graphire 3 with 2 ExpressKeys (buttons that can be linked with a keystroke) and a handy place to place your pen. If you own a Graphire 2 or a Graphire 3 then don’t bother upgrading. If you are interested in getting an upgrade then save up and get an