Category Archives: Photoshop Tips

Photoshop Preferences

Preferences Icon

In order to get the most performance out of photoshop, you should check out the photoshop preferences. Let’s go ahead and explore the most important settings in the preferences window of photoshop. If you are in a hurry then scroll down and do the stuff that is in Black font in order to increase the performance of Photoshop.

Go ahead and open the preferences window. Windows users should go to Edit > Preferences > General or use the keystroke CTRL+K. Mac users should go to Photoshop > Preferences > General or CMD+K.

Continue reading

Alpha Channels: An Introduction

If you have ever found your self selecting and then re-selecting the same portion of an image in Photoshop then you are in dire need of Alpha Masks.

Scenario: Imagine that you are working on a Photoshop project where you had to carefully select something. You took about 10 minutes to successfully select something. Then you worked in the selection for another 10 minutes and then you deselected only to realize that you forgot to apply a stroke (Edit > Stroke) to the image. What now? You’ll have to spend another 10 minutes re-selecting. 🙁

The whole re-selecting process could have been avoided if you had used Alpha Channels to save your selection.

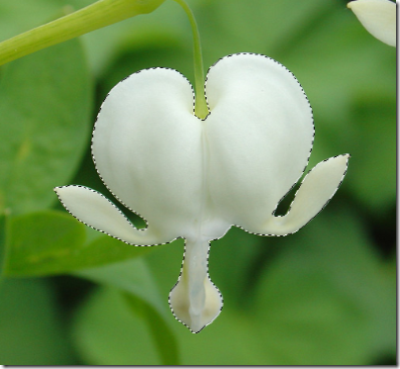
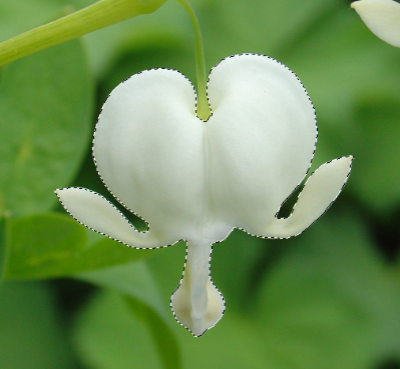
Selecting an Alien Flower

1) Here I have selected what appears to be an alien flower. It took me about five minutes (I selected in Quick Mask mode). I wouldn’t want to spend another 5 minutes re-selecting it in the future.

Saving the Selection For Ever

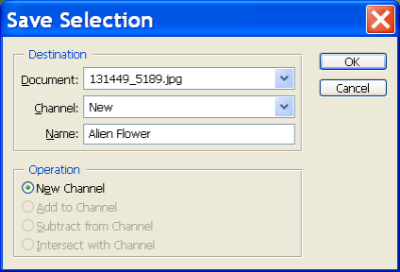
2) So now I want to save this selection. With a stroke of genius, I glide my mouse pointer with extraordinary skill all the way to the Select menu. While in this menu I click on Save Selection. Tada! I have successfully saved the selection. I’ll never have to re-select that alien flower ever again.

If you did the same then you should see something like the following window appear:

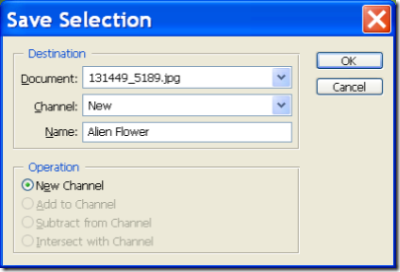
Enter a name and click ok.

Wait? What Happened?

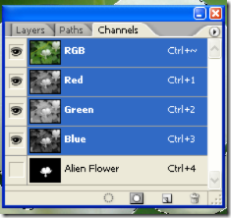
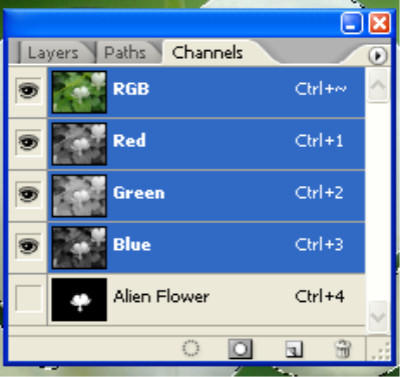
3) Nothing appeared to happen but if you go to your Channels Palette ( Window > Channels ) then you will see an Alpha Channel. This is the saved selection.

Moment of Truth.

4) De-select the current selection ( Press CTRL/CMD+D). Now if you want the selection to come back then just CTRL/CMD+ Click on the new Alpha Channel (called Alien Flower in this example) and your selection will return. Whew!

Not only will this selection re-use allow you to save time but now you have access to a whole new list of channel features.

Some Facts

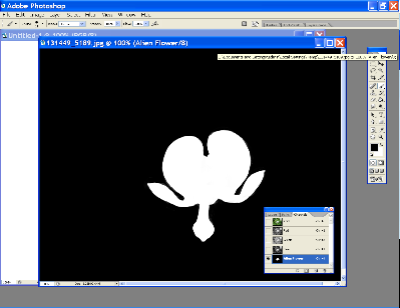
5) If you click on the Alpha Channel, the entire image will  turn black and white.

  • The areas that are not selected will be black
  • The areas that were with in the selection will be white.
  • The areas that are translucent or partially transparent will appear as shades of gray.

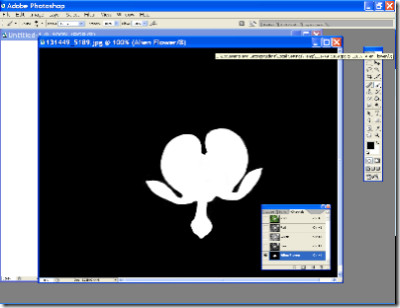
This view is helpful because you can check if you have errors in your selection. If your selection is fuzzy then you can adjust the levels ( Image > Adjustments > Levels ) or sharpen the selection ( Filter > Sharpen > Smart Sharpen ).

You are allowed to use most of the filters and image adjustment tools in this view. You can use this for your advantage and create lots of fun and useful effects. I’ll try to cover some of these in the days ahead. 😉

You can also use the paint brush, paint bucket, or pencil tool to reshape the selection. If you paint black then that area will get deselected. If you paint white then those areas will get selected. Gray areas will be semi-transparent.

What’s Next?

  • Line Art – How to separate the Lines from the Paper
  • Spot Colors
  • Channel Effects
  • and more.

[tags]Channels, Alpha, Tutorial, Tips, Photoshop, Alpha Channels, Howto[/tags]

Please leave a comment 🙂

Better color management for Windows XP

Windows Color Management 
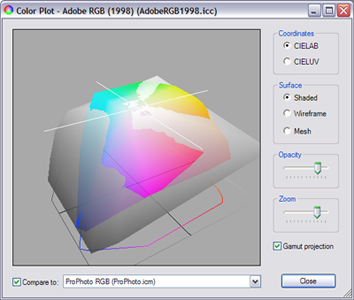
I have always used the Adobe Color Management control panel to calibrate my monitors. Apparently, I’m going to have to try something else tonight when I get home.

Microsoft has released a color management program to allow their users to do what Photoshoppers have been doing since man first started walking upright.

I have not tried it so I don’t know if this will cause your computer screens to blow up or not (It probably won’t.. but then again this is by Microsoft). You can download it by visiting this link (click here).

From the site:

Professional-level photographers and designers know that getting consistent, accurate color from file to screen to print and beyond is a requirement for great results.

However, until now Windows has lacked a central Control Panel interface for managing ICC color profiles and ICM 2.0 color settings across the system. The new Microsoft Color Control Panel Applet for Windows XP addresses this by adding a Color tool to the Windows Control Panel, making it easier for you to manage Windows color settings.

yay!

Photoshop KeyStrokes

After playing around with Photoshop for many years I have started using my keyboard to do useful stuff a lot. This was recently brought to my attention when someone commented on how I used the keyboard to Crop and Deselect images quickly. I am now going to try and compile a semi complete list of Photoshop Keystrokes that are the most useful.

First the regular File menu keystrokes that you should remember are:

  • New File: CTRL+N
  • Open File: CTRL+O
  • Save File: CTRL+S
  • Save As: Shift+CTRL+S
  • Save for Web: Shift+Alt+CTRL+S
  • Print: CTRL+P

We’ll be opening and closing and saving for almost every single document that we work on. By memorizing these you will be saving your selves a lot of clicks.

Next are the Edit Menu keystrokes. You must know these in order to become an efficient photoshop artist. The ones I most frequently use are:

  1. Step Backwards: ALT+CTRL+Z
  2. Step Forward: Shift+CTRL+Z
  3. Cut: CTRL+X
  4. Copy: CTRL+C
  5. Paste: CTRL+V
  6. Free Transform: CTRL+T

AND:

  1. Merge Down: CTRL+E
  2. Select All: CTRL+A
  3. Deselect: CTRL+D
  4. Inverse Selection: CTRL+SHIFT+I
  5. Repeat Last Used Filter: CTRL+F
  6. Brushes Palette: F5
  7. Color Palette: F6
  8. Layers Palette: F7
  9. Zoom in: Ctrl+”+”
  10. Zoom out: Ctrl+”-“
  11. Switch between foreground and background colors: X

Now the rest of the keystrokes that I use aren’t actually official keystrokes that Adobe has meant for us to use (well they have… but well.. read on). For example, if I want to desaturate an image the “official” keystroke is Shift+CTRL+U. I don’t know about you but I want to memorize the least amount of stuff as possible. Basically, if you hold down the ALT key (in windows atleast. I’m not sure about Macs) all the menu items will show one underlined letter. While holding down the alt key press the underlined arrow and that menu is displayed. With out letting go to the alt key continue pressing all the letters till you get to what ever it is you need. So instead of remembering Shift+CTRL+U for desaturation I’ll just press ALT+I+A+D.

The following are some important “unofficial” keystrokes:

  1. Levels: Alt I-A-L
  2. Feather: Alt S-F
  3. Image Size: Alt I-I
  4. Crop: Alt I-P
  5. Stroke: Alt E-S

Obviously there are tons more. It is up to you, the artist, to decide which ones will save you the most time. I believe that the key strokes that I have listed above are the most useful ones that everyone should know. If I remember some more then I will add them to this page!

The best way to memorize these is by actually using these. I, personally, never sat down and memorized these keystrokes. Just use them enough times and they’ll become second nature to you!

Please post any keystrokes that you use often but I have missed.